
Many of the macOS specific UIKit extensions require you to use a scene delegate. If your project was created before iOS 13 and you also don't intend to use multiple windows, you can follow these steps to add a scene delegate to your project and keep the app limited to one window:
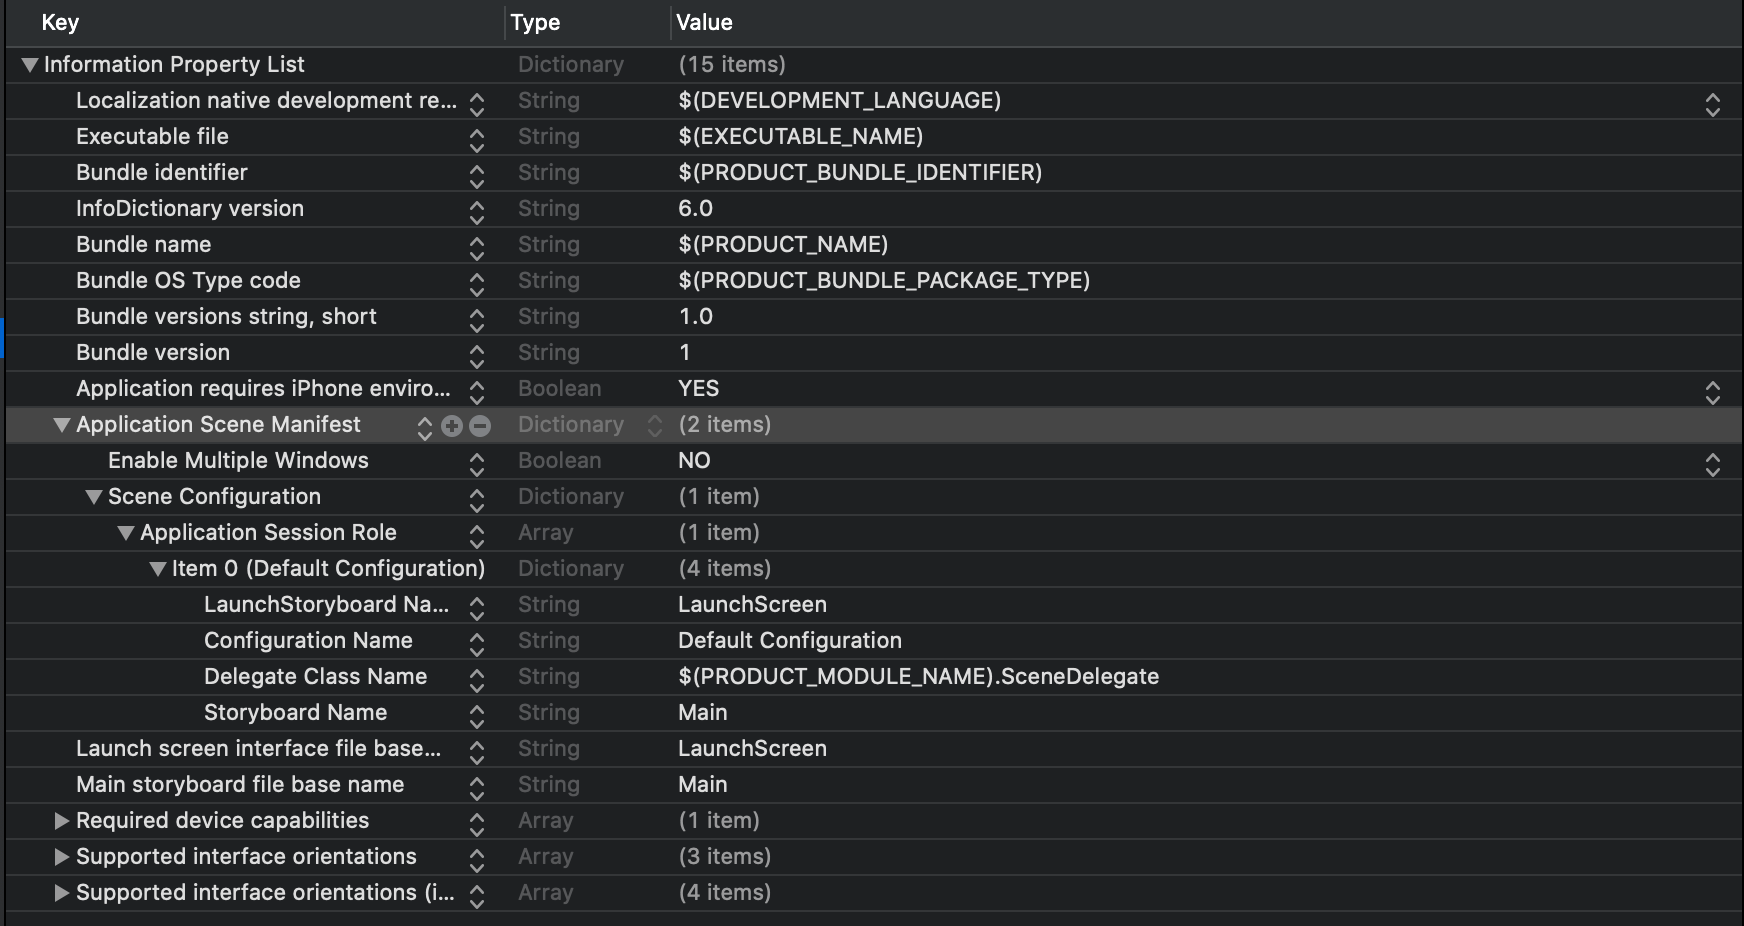
The first step is to add a scene manifest to your Info.plist. This can either be done in the Xcode plist editor or by adding the following lines to your Info.plist in source code mode (You can just keep the default names. They're fine):
UIApplicationSceneManifest
UIApplicationSupportsMultipleScenes
UISceneConfigurations
UIWindowSceneSessionRoleApplication
UILaunchStoryboardName
LaunchScreen
UISceneConfigurationName
Default Configuration
UISceneDelegateClassName
$(PRODUCT_MODULE_NAME).SceneDelegate
UISceneStoryboardFile
Main
Next, add the following two functions to your AppDelegate. Note that only one of them is used, but for posterity, it makes sense to add both in one go:
     func application(_ application: UIApplication, configurationForConnecting connectingSceneSession: UISceneSession, options: UIScene.ConnectionOptions) -> UISceneConfiguration {

         // Called when a new scene session is being created.

         // Use this method to select a configuration to create the new scene with.

         return UISceneConfiguration(name: \"Default Configuration\", sessionRole: connectingSceneSession.role)

     }


     func application(_ application: UIApplication, didDiscardSceneSessions sceneSessions: Set<UISceneSession>) {

         // Called when the user discards a scene session.

         // If any sessions were discarded while the application was not running, this will be called shortly after application:didFinishLaunchingWithOptions.

         // Use this method to release any resources that were specific to the discarded scenes, as they will not return.

     }
Finally, add a new file, SceneDelegate.swift to your project and add the following code to it:
import UIKit


class SceneDelegate: UIResponder, UIWindowSceneDelegate {


     var window: UIWindow?


     func scene(_ scene: UIScene, willConnectTo session: UISceneSession, options connectionOptions: UIScene.ConnectionOptions) {

         // Use this method to optionally configure and attach the UIWindow `window` to the provided UIWindowScene `scene`.

         // If using a storyboard, the `window` property will automatically be initialized and attached to the scene.

         // This delegate does not imply the connecting scene or session are new (see `application:configurationForConnectingSceneSession` instead).

         guard let _ = (scene as? UIWindowScene) else { return }

     }

}
By default, apple also adds the following, empty, methods to a new UIWindowSceneDelegate conforming class, but you don't necessarily need them and can always add them later:
func sceneDidDisconnect(_ scene: UIScene)

func sceneDidBecomeActive(_ scene: UIScene)

func sceneWillResignActive(_ scene: UIScene)

func sceneWillEnterForeground(_ scene: UIScene)

func sceneDidEnterBackground(_ scene: UIScene)
